🖨️ How to Create & Print Shipping Labels
| ⏱️ Approx. read time | 2–3 mins |
| 🧭 Audience | Book Donors / Smart Sell Users |
Before You Create Shipping Label
Your pickup request must be in BOOKED status before shipping labels become available for download.
If your pickup request is still in Draft mode, update the status to Booked (or Ready for Pickup) and save it first.
Step 1 — Open the Pickup Request
Go to My Pickup Requests, find your booked request, and click View (or the 👁️ eye icon). This opens the pickup request detail page.
Step 2 — Choose What to Download
You will see three download options:
| Option | What it downloads |
|---|---|
| Download All Labels | Summary page + all individual package labels in one PDF |
| Download Summary | Only the shipment summary (lists all packages in one page) |
| Download Package Labels | Only the individual package labels (one label per page) |
Download All Labels is the easiest option — it gives you everything in a single PDF with the summary on page 1 and package labels from page 2 onwards.
Step 3 — Choose Paper Size
Before downloading, select the paper size that matches your printer:
- A4 — standard office paper
- Thermal — for thermal label printers commonly used for shipping labels
Step 4 — Print Your Shipping Labels
Open the downloaded PDF and click Print. In the print dialog you have two layout options:
Option A — One label per page (default)
Simply print as-is. Each label prints on its own page.
Option B — Two labels per sheet (saves paper) - Available for Windows , MAC.
Screenshot reference is for MAC user only.
If you want to save paper when printing a large number of shipments:
- In the print dialog, go to Layout
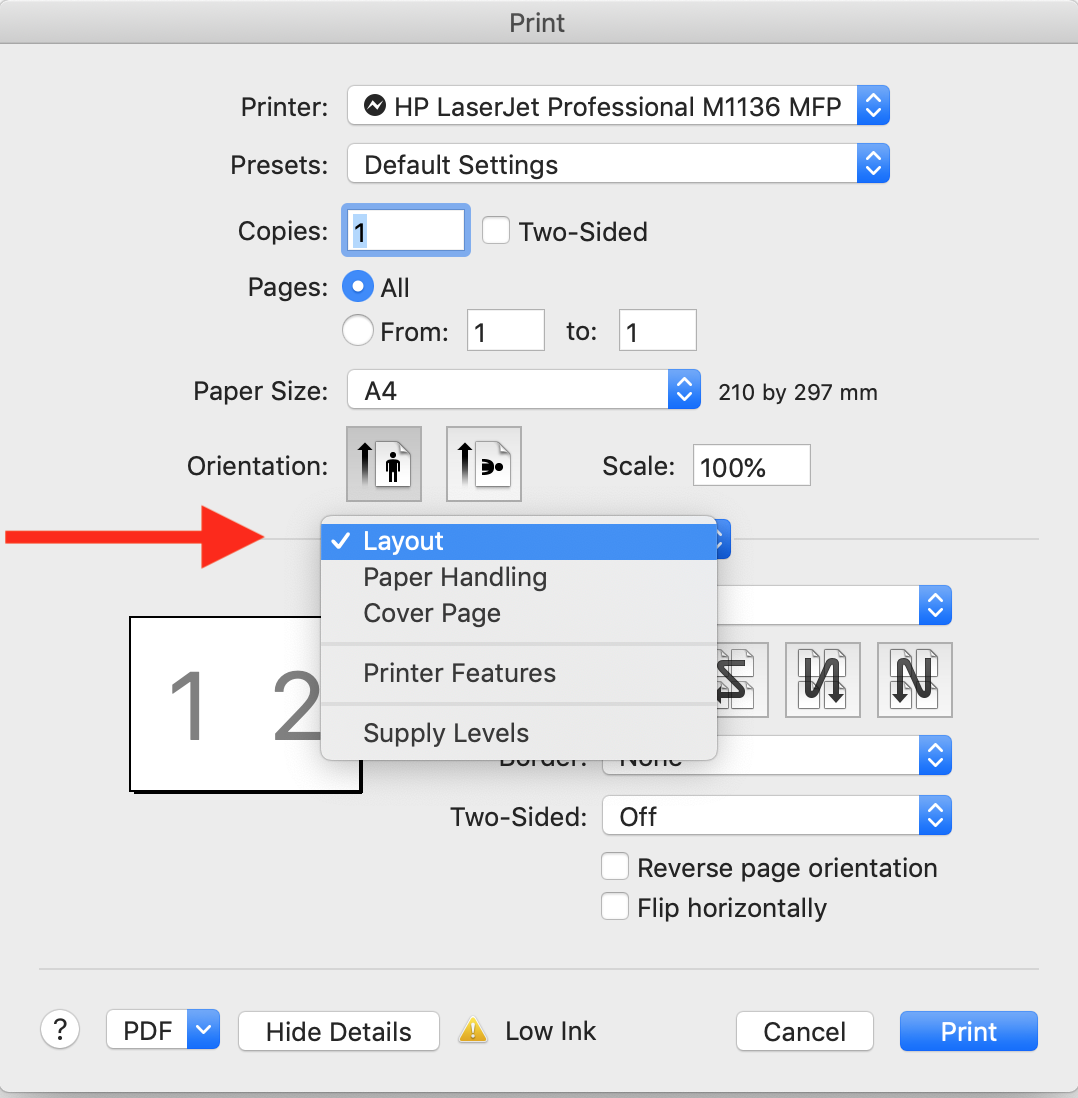
- Set Pages per Sheet to
2
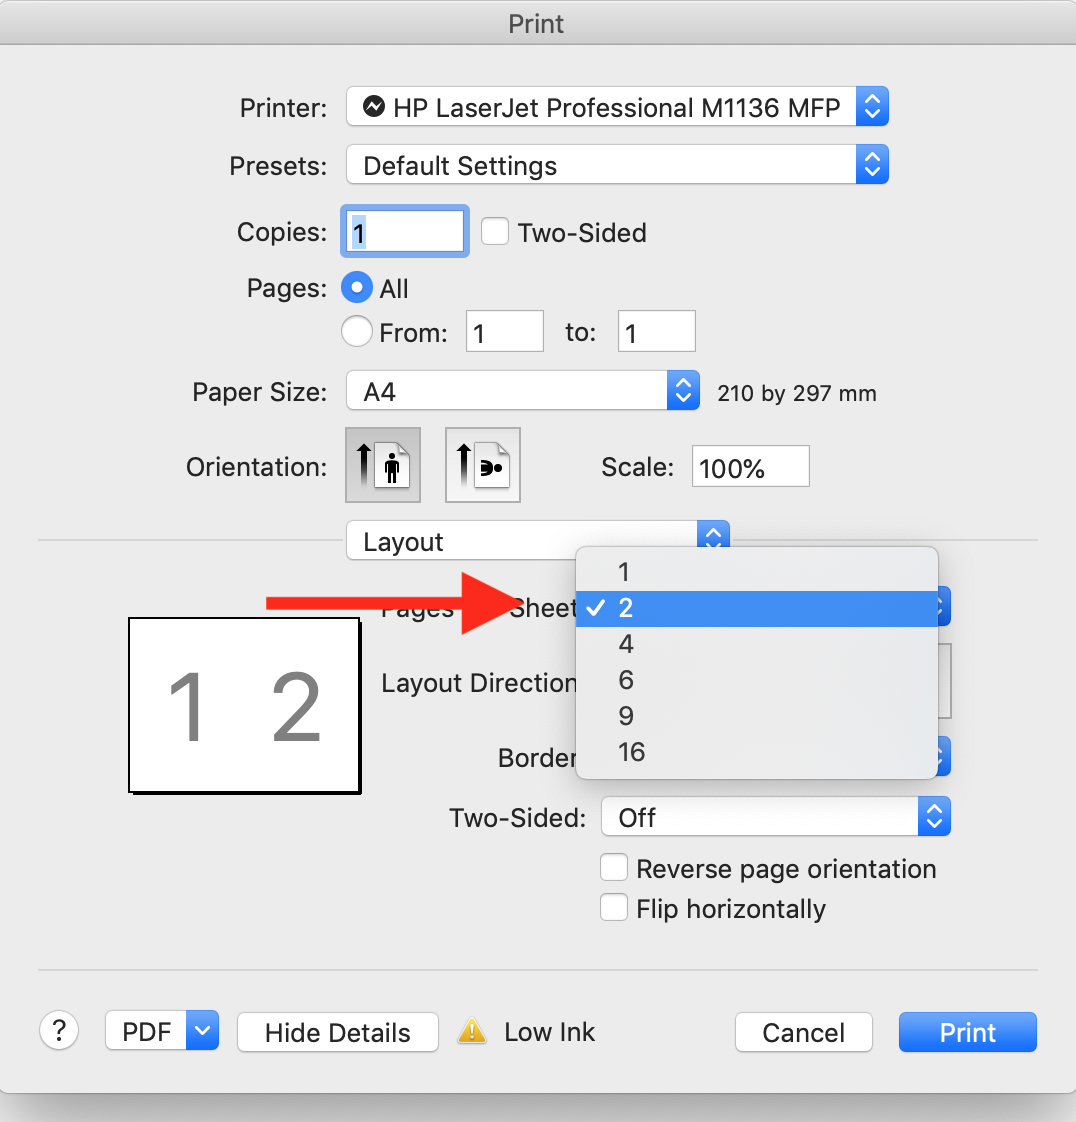
- This splits an A4 sheet into two A5-sized halves — one label per half
Using 2 pages per sheet is a great way to cut paper usage in half when you have many packages to ship. Don't use 4 pages or more, it becomes un readable.
Don't use 4 pages or more, it becomes un readable.
Step 5 — Stick Labels on Your Boxes
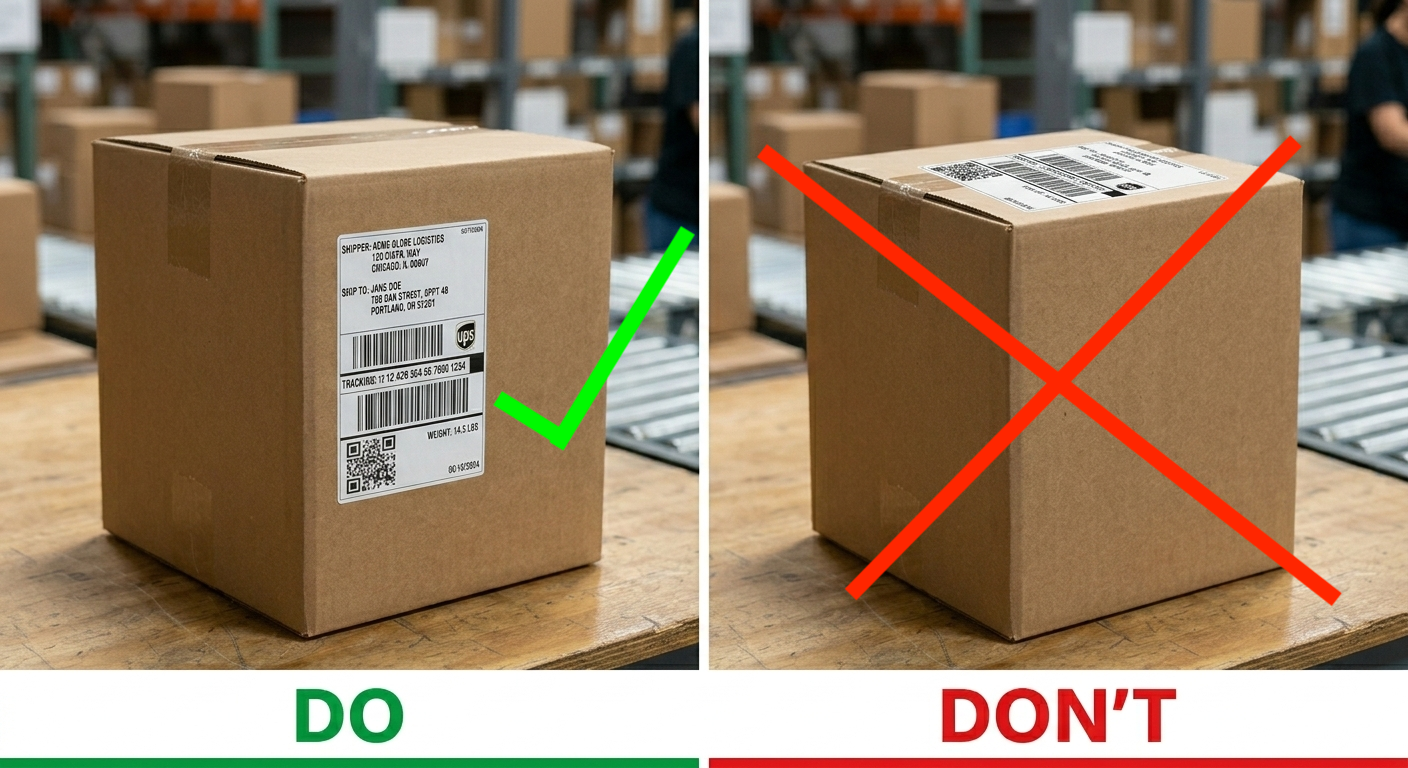
Once printed, stick one label on each carton box.
Stick the package label on the side of each box (not the top).
- You can print extra copies of the summary to hand over to the courier agent who comes for pickup, and keep one copy for your own records.
- Stick the package label on the side of each box (not the top).
Step 6 — Mark as Ready for Pickup
After sticking all labels on the boxes:
- Go back to your pickup request
- Change the status to Ready for Pickup
- Click Save
Once you mark the request as Ready for Pickup, PutForShare will automatically schedule the pickup. Your job is done!
Quick Reference
| Task | Action |
|---|---|
| Download everything | Click Download All Labels |
| Download only the packing list | Click Download Summary |
| Download only sticker labels | Click Download Package Labels |
| Print 2 labels per A4 sheet | Set Pages per Sheet → 2 in print dialog |
| Schedule the pickup | Change status to Ready for Pickup and save |
Need More Help?
Need more help? Contact support or raise a ticket from your dashboard.
Was this article helpful? 👍 Yes | 👎 Not really